
Sunday, February 25, 2018
Saturday, February 24, 2018
Infrared Photographs and how to get them.
Getting Infrared photographs need not be expensive. The camera I use in some of the shots was under $60 dollars. The Infrared filter was $8.00 and I'm getting a filter holder for around $7.00, so for around $75 dollars, you can get infrared images. Or, you can visit a site like https://www.lifepixel.com/shop, and either buy a high quality converted camera or have your existing camera converted. The cheapest place I've found is eBay, and I searched for "Full Spectrum Camera". The current camera I have now is a Vivitar 5200 10 megapixel point and shoot, but I've owned Sony cameras with a "Night Shot" function that was really an Infrared mode.
Light is not much different than the electricity that runs your house. The only difference is the frequency in which the energy vibrates. In the case of light, the frequency is measured in the distance between peaks of the vibration as the light travels through space. For visible light, the distance is in a range from 700 Nanometers to 390 Nanometers, 700nm being at the red end of the spectrum and 390nm the blue end. Anything just beyond 390nm is considered UltraViolet, and anything beyond 700nm is considered Infrared. Your eyes aren't normally sensitive enough to detect either Ultraviolet or Infrared under normal conditions, but a camera sensor is very sensitive to both and may extend to 1000nm depending on the camera sensor.
Converting a camera
Because our eyes are not sensitive to Infrared or Ultraviolet light, cameras have "Hot Mirror" filters that block this light so photographs look normal, otherwise, they would have a strange color cast to them. To take Infrared photographs, this filter must be removed by a person experienced in its removal. Removal of the filter does not preclude you from ever taking normal photographs again, but you will need to purchase a filter that mimics the Hot Mirror in your camera. A camera with an electronic viewfinder is also convenient since it will allow you to see what you picture will look like before you take it, but if you convert a DSLR camera you will have to check your picture after you record the image.
Thursday, February 22, 2018

Tuesday, February 20, 2018


Open up the Chanel mixer. In the Red output channel, set red to 0% and blue to 100%. Change to the Blue output channel and set Red to 100% and blue to 0%. In my case, I had to play with different percentages to get a final outcome since my white balance isn't perfect, but here is what it looks like.
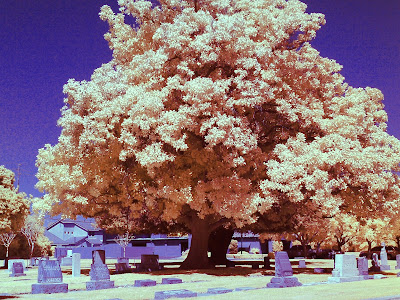
After some adjustments, this is the final image
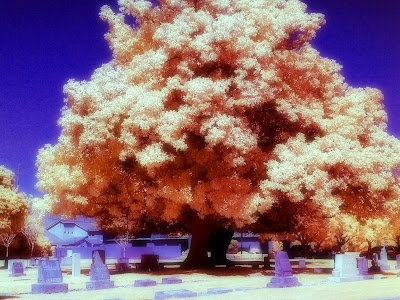

After some adjustments, this is the final image

Monday, January 15, 2018
Black & White vs Color Infrared.
True infrared images are from a wavelength of equal to and greater than 720nm. Popular filters are 720nm, 760nm, 850nm, and 950nm. All these filters produce a monotone image with little to no color. Since plants reflect infrared more than surrounding objects, the leaves appear white. In some cases, the infrared light will pass through the plant and actually make the plant seem translucent. Color filters pass both visible and infrared light depending on the filter and produce false colors.
When attempting color Infrared images, the key to success is white-balance. Most cameras have an Automatic white-balance setting that must be disengaged. If your camera has a custom white-balance setting, you can either set the white balance to something neutral like concrete or off greenery like trees or grass, both will have different effects. If you white-balance off green, anything green will become white in the photo. The sky will come out the color of the filter. If you white-balance off something neutral like concrete, it will be some shade of gray, the sky will be the color of the filter, but the greenery will be the opposite of the filter on the color wheel. A blue filter gives you a blue sky and yellow leaves. A green filter gives you a green sky and purple leaves, a red filter will give you a red sky and blue leaves.


In some cases, a camera might not have the ability to set a custom white-balance, it which case you might be able to set an incandescent or fluorescent, white balance, the idea being to separate the colors out of the image. What happens if you use the automatic white-balance? If you attempt to use automatic white-balance, you will end up with a red or purple image in the case of infrared images, or some other color depending on what color filter you attempt to use.


I've mentioned converted camera's, but what does that mean? Every camera has an Infrared/Ultraviolet blocking filter over the sensor. In order for your camera to take infrared images, this filter has to be removed to receive the most amount of Infrared light. Without that process, Infrared becomes difficult in the case of B&W to impossible with respect to color images. You will have the choice of "full-spectrum" conversion or conversion to a specific wavelength depending on what the company offers. If you get your camera converted to 590nm, for instance, you will be able to take some false color and by adding additional filters to the lenses, higher wavelengths, for instance, you can take a 760nm picture if you have a 590nm conversion, but you can't take a 590nm image if you have a 760nm conversion.
With a full-spectrum conversion, you can use any wavelength you wish, including using a "Hot Mirror" filter that allows you to take "normal" images again as if you never had the conversion. It's like having two cameras in one.
If full-spectrum is so great, why get a conversion to a specific wavelength and limit yourself? Some cameras don't have an electronic viewfinder. If you have an older camera that has a pentaprism, putting an infrared filter over the lens will block you from seeing any light. This makes infrared photography difficult, but not impossible. Before electronic infrared was available, you had to use infrared film. This meant using a tripod to set up the shot and focusing, then screwing on the filter to take the photo. This was followed by a prayer that you guessed your exposure correctly, and you didn't find that out until you processed your negatives. Now at least you can post view your images. An electronic viewfinder means you see what the sensor is seeing, so what you see is what you get. If you decide to purchase a dedicated camera, look for this feature, it makes life easier.
Saturday, December 16, 2017


Sunday, December 03, 2017


Tuesday, November 28, 2017

Tuesday, October 18, 2016


Friday, January 18, 2008
Thursday, March 09, 2006

Friday, November 04, 2005

Sunday, May 08, 2005


Monday, April 18, 2005
Infrared at the Huntington Library
These are some photos that were taken at the Huntington Library near Pasadena California. I tried to capture foliage that has some contrast like the trees which end up with darker bark, or in the case of the Temple of Love, it had a wrought iron roof that contrasted with the plants behind it. In the comparison picture you can see that the dark iron gets lost in the dark foliage, but really pops in the infrared photo.

Left: Normal Photograph Right: The same subject taken at the same time in the Infrared mode with an Infrared filter
Posted by Hello


Subscribe to:
Posts (Atom)